Showing posts with label tips. Show all posts

August 18, 2010

Guide to Cooking Terms

Ever come across a cooking term and wonder, "what does that mean?" or "what is the real definition of al a Mode?" I thought I would share with you some of the things I have learned when coming across some cooking terms I didn't know, as some I found in my research. Now you can be like Giada and whip out words no one has any idea what they mean, but at least you sound fancy!

à la Mode - literally, “following the fashion”. In the United States, it is a food that is served with ice cream; in France it names braised meat smothered in sauce. (I thought this was so interesting - don't order in France thinking you are getting a dessert!)

al Dente - Italian for to the tooth; used to describe a food, usually pasta, that is cooked only until it gives a slight resistance when one bites into it; the food is neither soft nor overdone. (Don't over cook your pasta ever again!)

Antipasto - assorted hors d’oeuvres, Italian style. Often included are ripe black olives, green stuffed olives, garlic sausage slices, salted anchovy curled on a sliced tomato, cooked dried beans in a vinaigrette dressing, prosciutto (thinly sliced fat ham) with cantaloupe.

Bain Marie - Simply a water bath. It consists of placing a container of food in a large, shallow pan of warm water, which surrounds the food with gentle heat. The food may be cooked in this manner either in an oven or on top of a range. This technique is designed to cook delicate dishes such as custards, sauces and savory mousses without breaking or curdling them. It can also be used to keep foods warm. (I actually heard Ina Garten use this term and it inspired this post. It is a gentle cooking method and keeps the temperature stable and things cooking evenly)


Bechamel sauce - This is a white sauce made with milk or cream and thickened with a roux. Bechamel sauce is generally used as a base for other more complex sauces, though it may be used alone for binding or moistening. (see definition of Roux below)

Blind Bake - To bake a pie crust without the filling. Metal weights or dried beans are usually used to keep the pastry from bubbling. (Mmm. Pie!)

Bouquet Garni - A bunch of herbs (traditionally parsley, thyme, and bay leaf) bundled up in a cheesecloth bag that usually dangles into a stockpot via a string. The herb bundle gives the stew, soup or stock an aromatic seasoning. The bouquet garni is removed before serving.
 
Bruschetta - Grilled slices of bread brushed with olive oil and fresh garlic. (I included this because I think so many people think Bruschetta is the tomato part - but it is really just a toast, you can put anything on it!)

Butterfly - To split a piece of food down the center, cutting almost through. The halves are fanned open and laid flat to cook or fry. The fan resembles a butterfly. ex - butterfly shrimp.

Chiffonade - French for 'made from rags.' In cooking it refers to a small chopped pile of thin strips of an ingredient. Usually it is raw, but sometimes sautéed. Mostly used to garnish. (I learned this is when you roll up herbs or leaves, like basil, and cut into strips...)

Cream - To beat butter, margarine, or other fat until it's creamy looking or with sugar until it's fluffy and light. THis technique beats in air, creating light textured baked goods. (Mmm. Cookies.)

Cut-In - To mix a solid fat such as butter or shortening into a dry ingredient such as flour, using a pastry blender, a fork or two knives. (This is usually for recipes like pie crust or biscuits - something you want to be flaky.)

Deglaze
- A process of adding a liquid such as wine, vinegar or stock to a hot pan to collect the bits of food left on the pan during cooking. Deglazing is most common with sauteed and roasted foods.
  

Dredge - To lightly coat food with dry ingredients like flour, cornmeal, or bread crumbs...the usual preparation for frying.

Emulsify - The process of combining ingredients like water and oil with a binder. The blended product is an emulsion. These blended combinations can last from a few minutes to a few days depending on the ingredients. Mustard and egg yolks are two common emulsifiers. (Notice how I use mustard in a lot of my salad dressings? That's why!)

Fork Tender - A degree of doneness for cooked vegetables and meats .When the food is pierced with a fork, there is only a very slight resistance. 

Julienne - to cut food, especially vegetables into thin, uniform matchstick strips about 2 inches long. 

Pare - to cut away the skin or rind of a fruit or vegetable. (Get it? You usually use a Paring Knife? Oh they are clever.)

Proof - To dissolve yeast in a measured amount of warm water (105 to 115 degrees F), sometimes with a small amount of sugar, then to set it aside until foamy. 

Roux - A mixture of flour and fat such as butter or margarine, used to thicken sauces, gravies, soups, and stews. Roux can also be made with bacon or meat drippings or poultry fat. After thickening, roux are cooked for a short time. In Creole cooking roux are cooked for a longer time, until they are a dark brown color. (Roux is the plural of Roux... it isn't a typo... though it is throwing me off too.)

Scald - To heat milk almost to the boiling point just as tiny bubbles start forming on the inside edge of a pan.

Score - Making shallow cuts in meats before cooking, making the meat more tender.

Soft Peaks - When cream or egg whiles are beaten until the stand in peaks that bend over at the top.

Stiff Peaks - When cream or egg whites are beaten until they stand in peaks and hold their shape. 

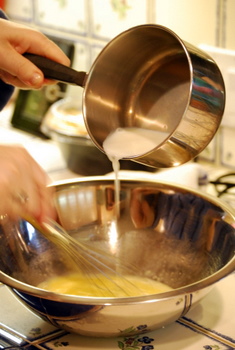
Temper - To slowly add a hot liquid to to an egg mixture or other food being prepared to raise the temperature without making them curdle or begin to cook. (Like in pudding or a custard... mmm. Flan.)
Zest - The colored skin of citrus fruit - not including the white layer.       

May 13, 2010

Salad Spinner Tips

I never had a salad spinner growing up. I thought it was kind of a silly invention. "Why do you need that? Just put your lettuce on a towel!" Little did I know.
I love my salad spinner now. When we were first married I had a smaller bowl, thinking I won't be making salad for more than 2 for a few years. But when we broke it, I was glad I bought this bigger model.


Here are a couple of my favorite things to do with my salad spinner:

1 - Have limpy lettuce? Don't throw it out! I had some spinach the other week sit in a hot car for a little too long. Just put the spinach in the spinner, fill it with cold water and stick it in the fridge for a until you are ready to eat. (This is great for fresh spinach because all the dirt goes to the bottom of the bowl. Remove the slotted bowl, dump the water, and spin the rest of the water out. It works with any lettuce. I just did it yesterday with this Romaine!


PS - if you don't have a salad spinner, you can do this with really cold water in a clean sink. Or big bowl. If you don't have time to put it in the fridge, you can just do really cold water, even ice water for 10-15 minutes.

2- I hate soggy salad. I also hate wasting food. So, here is another great tip. If you have accidentally put on too much salad dressing, put the salad through the salad spinner. Now you have a less soggy salad and you can dump that salad dressing right back into the jar. Beautiful!

Do you have any salad spinner tips?

February 12, 2010

Valentine's Day Menu Ideas

I still haven't decided what to make for my sweetheart for Valentines Day. I know we are having dinner rolls, asparagus, and Martinellis. But haven't decided the two most important things - main course and dessert. My husband's request - taquitos. No, I am not making tacquitos for Valentine's Day.


If you are like me, here are some ideas to help spark your interest.

Main Course
Bacon Wrapped Pork Tenderloin from Cafe Johnsonia
Chicken Francese from Gina's WW recipes
Grilled Ribeye with Onion Blue Cheese Sauce from Pioneer Woman
If you want to make a good ol' steak - PW has a great tutorial

Side Dish
Hasselback Potatoes
Sweet Potato Gnocchi with Sage Walnuts and Browned Butter  although her blog is now closed, Cafe Johnsonia has left her recipes up for us to enjoy
Roasted Cauliflower with Capers from Rookie Cookie

Dessert
New York Chocolate Cheesecake
Red Velvet Layer Cake from Bobby Flay
Cupcake Pops from Steamy Kitchen
Heart Shaped Ice Cream Sandwiches from No Biggie
Chocolate Caramel Cookies with Sea Salt from Two Peas in a Pod

Now what should I make?

January 15, 2010

Make Every Day Special

Can't decide what to make for dinner? Check out what holiday it is. Maybe it is oatmeal Monday - make steel cut oats for breakfast, meatloaf with oatmeal in it, and oatmeal chocolate chip cookies for dessert. Or maybe it is arbor day and everything has to be in the shape of trees: make a steak trunk with green mashed potatoes for the tops. Or just serve broccoli.


Look how fun my month of January is. Today is Strawberry Ice Cream day and Hat day. I think for dinner we will all wear silly hats and have strawberry ice cream for dessert. Too bad I don't have those bowls that look like baseball helmets that you get at a baseball game. We could have eaten our ice cream out of those bowls.
What do you do to spice things up at your kitchen table?


If you have a Mac, or iCal, I have made a calendar you can download easily onto your computer. If you would like it, just email me.


December 18, 2009

Holiday Time Saver

This time of year is full of family, parties, and of course - treats. But sometimes you are hopping from one event to the next that you are feeling a little ragged, right? Well, here's a little helpful tip - take something store-bought and add something homemade. This fools people that you made the whole thing by yourself.
This was my treat to bring to a family party:


I bought these little brownies from Costco, then I made a buttercream frosting, and topped with crushed candy canes.
Here's another tip: Hand your kids a bag of candy canes (you can leave the paper on, its easier to pull off once their crushed), a rolling pin, and let them have at it!
Here's my buttercream recipe:
Buttercream Frosting
2 sticks butter, room temperature
6 cups powdered sugar
1 tsp vanilla
1-5 Tbsp milk
few drops food coloring (optional)

With hand mixer, beat butter until light and fluffy. Add powdered sugar and beat until texture is like small beads. Add vanilla and 1 Tbsp milk. Beat until fully combined. Continue adding milk, a tablespoon at a time until you have reached desired consistency.

Make this work any time of year: use different color food coloring and toppings (use candies, sprinkles, nuts, etc)

December 14, 2009

Christmas Candy

This were my gifts for neighbors and friends. I got the buckets at an After Christmas Sale a year or two ago. Then I bought cute tissue paper, plain celophane bags, and used these cute tags made by my talented sister - and their free! (I didn't get a picture with them). The buckets are filled with Pecan Toffee and Peppermint Bark. Those recipes are coming this week!


I did an assembly line, and whipped out 12 gifts in just a few minutes.

Get excited for these recipes to come:


Pecan Toffee


Peppermint Bark


December 08, 2009

Potato Stamps

I love this idea - it combines three of my favorite things: Food, Crafts, and Christmas! Super easy too. Just take a raw potato, cut in half, then cut out the image you want. You can use a carrot too for smaller images. This is great for kids who need a little better handle.
My mom taught me this when we were really little. It is super fun for kids and adults alike! I love buying blank wrapping paper and making it my own. 


This was one of the papers I have made. Trees are super cute and easy, candy canes, the words "ho ho ho." It would also be cute to have the person's initial of who was receiving the gift in Christmas colors. Do anything! Try it out!

November 11, 2009

Recently Starred Items

Some great blogging lately! I haven't had time to catch up on all the recipes I have wanted to make. Here are some of the things I have made or want to make.


 image via Pinch My Salt

Pumpkin Doughnuts
Pumpkin Cream Cheese Streusel Muffins
Apple Cake in an Iron Skillet
(hmmm... they are all desserts. weird.)

Some great tips to help you through the Thanksgiving Holiday:
Thanksgiving Timeline
Martha Stewart's Thansgiving Index

Some beautiful Tablescape Ideas for Thanksgiving:


 Isn't this a great idea? Pumpkin for a vase! Cheap too!


Wishbones! For Napkin Rings! Martha. You amaze me.

What great tips or recipes have you found for Thanksgiving?

November 06, 2009

Questions Asked: Picky Eaters

Kellie asked me, "My sons doctor says that he needs to gain weight. He has not gained weight in about 6 months. He is 18 months old and a very picky eater. Any suggestions??"


 picture via dandelion mama

I only have a 9 month old and she is not picky in the least. But I did live with my niece and nephew for a year and did see some pickiness. Here are some tips you could try:
1. Make it fun! Use fun names "witches juice" "monster legs" "princess pasta" etc. Have you noticed how kids will try lots of foods on Halloween? Also, try cutting into fun shapes, use cookie cutters. Put them on colorful plates, or even their toy plates. Use silly utensils - toothpicks, chopsticks (they make some for kids), measuring spoons, or on a skewer. Have a no plate day - place a plastic table cloth down, and everyone eat off the table.
2. Have them help. Let kids pick out groceries at the store. Let them help make it in the kitchen. They are more likely to eat that way.
3. Nibble trays or dipping. If you are having pasta, put the sauce on the side and let them dip it. It's much more fun. Use a muffin tin or ice cube tray to put lots of different items for them to pick up. Fun, healthy dippers include yogurt, peanut butter, and guacamole.
4. Protein. If you child is having a hard time gaining weight, find items high in protein that will help fill them up and aid in growth. Try string cheese, avocado, peanut butter, beans (my niece would eat garbonzo beans out of the can), and yogurt.
5. Get nutrient rich foods. If you child will only eat bread, make sure it is the wheat bread.
6. Get the junk out of the house. If all they see are colorful boxes of cereal and fruit snacks, they are not going to want the boring packaged foods.
7. Use lots of Praise. Praise the child for trying, eating, or experimenting - even if they didn't eat all you wanted.
8. Be Patient. It takes a child, on average, 10 times of trying a food before they like it. Reintroduce foods every once in a while.

Here are some articles I found very helpful:
Mayo Clinic: 10 tips for picky eaters
17 Great Tips to Try

What about you readers? Any other tips for Kellie?

October 28, 2009

More Meal Planning

If my last post on meal planning seemed overwhelming, here are a few helps.

Feeling overwhelmed?:
Take one tip and use it, you don't have to do it all.
Slowly add in the other tips if you want
Just know - the getting started is more work than any of the planning. It will save you time in the end

Can't decide what to make?:
This Week For Dinner - weekly menus (both hers and in the comments)

Don't know what to do with your ingredients?:
Allrecipes.com - use their advanced search, you can type in ingredients you want or don't want. The ratings are a great help.

Help with couponing:
Pinching Your Pennies - a great link to organize ads and coupons for various areas
Savvy Shopper Deals - a great link to organize ads and coupons... but mostly in Utah County area; anyone can benefit from her video tutorials
Coupons.com - print online coupons
Boodle.com - print online coupons
Check the manufacturer's websites for coupons

What resources do you use? I would love to add them to this list!

October 23, 2009

Meal Planning

I love things to be organized - from my schedule to my underwear drawer. Recently, I have been working on my home organization; I divided up my chores similar to Martha Stewart's advice and I have organized my menu. Menu planning saves me time and money. Things don't always work out perfectly - life always throws us surprises - but I try to be ready for the "expected."

Here are some things that help me:


Required Tools: coupons, notepad, pens, pencils, binder, and 3x5 index cards. (I get these out every Saturday morning when I am making my schedule.)


1. Organize the week. This planner is located on my fridge. (Pink=Lou, Green=AC, Blue=me.)  Because of my work schedule, my weeks are never the same. The blue strips are magnetic so I can move them around depending on the week. (AC and Lou are pretty much the same each day. They don't use theirs, but I schedule my life around them.) My menu depends on the week. (The nights I work I do easy, reheatable items. Some days are so busy, so we go out to dinner.)


2. Compare ads and/or coupons to see what is cheap. Yes, these are my crazy coupons clippings


3. Make a menu using the cheap items. Plan out breakfast, lunch, and dinner. I make meal cards using 3x5 index cards. One side is the meal, the other is the shopping list. On the shopping list, I write everything I would possibly need for that dish. You certainly don't need to type yours.
*These photo protectors are great. You can find them at Walmart. If you want, you could replace the day label with the snack if you want to plan even more.


When the week is over, I put my meal cards into a recipe box. I made tabs for all meals plus an "Other." This is where I have "Eat Out" or "Dinner at the In-Laws" etc.

4. Review your shopping lists. Make a list of what you don't have already in your house.
5. Be flexible when shopping. If your list says "broccoli" but asparagus is cheap, switch them out. Sometimes there is a great unadvertised sale.
6. Make menu adjustments based on what you bought. If you need to, you can switch out the menu cards.

A couple more items of note:
-I also store some recipes in the binder and place them behind the menu card. It is nice for those helpful spouses who want to help out with making dinner.
-After a month or so, you really won't be making many new cards. It becomes a lot easier!

I realize am a little OCD, but this system is so worth the effort!

September 15, 2009

The Importance of Measuring

My mom is one of the most amazing bakers/cooks ever. And I am not just saying that because I grew up on her food. Really, she is amazing. That's why I don't feel that bad posting this - it is purely comedy that she did this.
So along with my mom, my grandma was a great baker - with a knack for the sweets. She had this oatmeal chocolate chip cookie recipe that was to die for. My mom made it this weekend on our getaway. (Minus the chocolate chips because my sister doesn't like chocolate - I.know.) I saw them and thought they looked odd - the exact shape as when they went in - fingerprints and all. Plus, they tasted like flavorless hockey pucks.


She doubled the recipe so I thought something had to have gone wrong there. We went over the recipe, yep, she read it wrong. The 3/4 cup shortening, sugar, and brown sugar were interpreted as 1/4 cup. (It is hard to read). Then she only had 3 eggs, not 4. So, we tried to fix it and ended up with these. They tasted slightly better (enough that the kids ate them) but just waited until Hannah brought up the dough she happened to make earlier and froze. Bless you sister. (follow the link to see how the dough really should look).


Oatmeal Chocolate Chip Cookies
3/4 c. shortening
3/4 c. brown sugar
3/4 c. white sugar
2 eggs
1 t. vanilla
1 1/2 c. flour
3/4 tsp. salt
1 tsp. soda
2 c. quick rolled oats
1 pkg. chocolate chips
3/4 c. chopped nuts (optional)

Cream together shortening and sugars. Add eggs. Add remaining ingredients in order and mix well. Bake at 350 degrees until done. (About 10-11 minutes.)

*Although we did have a failure due to poor eyesight and bad printing - I promise, these are some of the best cookies you will ever have!

September 02, 2009

What's in Season - September

Ever curious what's in season? Well, during the month of September - these are some of the produce that you will find. These are at the peak of their season, they will be at the farmer's markets, the cheapest at the store, and the best tasting. Look for recipes that include these items.


photos via Google Images

1. Carrots
2. Beets
3. Eggplant
4. Potatoes
5. Peppers
6. Cabbage
7. Melons
8. Peaches
9. Tomatoes
10. Summer Squash
11. Swiss Chard

These are the items in season here in Utah. If you are looking for what is in season in your state, check this tool out for some help.

August 31, 2009

Extra Zucchini

If you are worried about your zucchini going to waste before you can use it, here is a little tip.
Grate your zucchini in your food processor. Place in freezer bags, label and date bags, and store until ready to use. When ready to use defrost at room temperature or in refrigerator. Ring out on clean kitchen towel before adding to favorite bread, cake, or fritter recipe.

August 28, 2009

Baby Boost

I live in small apartment. I am always looking for items that fold up, have multiple uses, and that don't take up much room. This booster seat was the perfect alternative to save me room in my kitchen. No, I am not getting reimbursed by Fisher Price, I just like the idea. This booster just sits on one of our chairs, and then can fold up and carried to Grandma's house. Perfect!

August 03, 2009

What's in Season - August

The month of August has snuck up on me! I love the summer and fall months for the fresh fruits and vegetables. Thanks to my Good Housekeeping Cookbook I am able to find out not only how to use fruits and vegetables, but when their peak season is. Here are some local fruits and veggies in thier peak season in August.

Photos courtesy of Google Images
1. Shell Beans
2. Peaches (Utah peaches are delicious - I can't wait to buy me a box)
3. Wax Beans
4. Cantaloupe
5. Corn
6. Plums
7. Honeydew
8. Currants
9. Beets
10. Nectarines
11. Tomatoes
12. Summer Squash
13. Watermelon

Enjoy your local fruits and vegetables from your farmers market!

June 24, 2009

Jalapeno Tip

Yesterday I made fajitas for my family. I know it seems silly in Hawaii - but my Dad misses Latin foods. (There aren't too many here, mostly asian.)
I learned a couple things about our friendly jalapeno that I thought I would share with you.

1 - As you probably know, the heat lies in the seeds and in the ribs. Remove those to make a more mild salsa.

2 - Do not use your hands to remove the seeds or ribs. I don't think you need gloves, these peppers aren't that hot, but use a spoon or your knife.

3 - The oil in the peppers is what makes your hands taste spicy after - wash immediatly after. This oil can burn you. (Yes, I know this from experience - I removed the seeds with my thumb, and behind my finger nail was a little sore all night.)

4 - (This one I figured out myself - its the best!) To remove the oil from your hands, if washing doesn't work, soak a cotton ball in rubbing alcohol and rub the area. The alcohol removes oil! Isn't that awesome? That's my culinary experience mixed with my nursing knowledge! Try it! Hey, someone let me know if it works with onions or garlic!


June 12, 2009

Knife Care


My mother-in-law has the worst knifes ever! Literally - she will admit it too. It takes three times as long to cut something with her knives than with mine (thanks Mom for the great gift!) I was inspired for this post by her - she finally bought a new set and cutting boards.

I thought I would let you in on the secrets to knife care that I have learned over the years.

1 - You don't need lots of knives, or even spend tons of money - but it is worth the investment to have one good sized knife that is sharp. I have these and love them.

2 - The handle should be heavy. This tells you that the blade of the knife and the handle are one piece. That's a good sign. Also a good sign is if the handle is wood, you can see a metal stripe all the way to the base of the handle. (I would recommend a handle that can go in the dishwasher though.

3 - I know what you are thinking, "You can't put good knives in the dishwasher! It dulls the blade!" False. You can put them in the dishwasher. I did some research - it only damages the blade if it is near metal and bangs up next to it. So keep it away from some of those utensils and other knives.

4 - Paper or Plastic? Both! Boards that is. (Well, not really paper - wood.) Your cutting boards should be made of one of two things - Wood or Plastic. Plastic for raw meats, wood for everything else. If you have a good butcher block that is treated well, juices, oils, etc., should not leak through. No glass. None. No acrylic. Throw them away. I don't care how cute they are.
* Your butcher block should be at least an inch or two thick. That way you can sand it and treat it when needed. We will talk about butcher blocks another day.

5 - Do not use that "knife sharpener" that comes with your knife set. That is a wet stone and only really fancy chefs and other knife professionals should use these. If you use it and just the wrong angle, it will damage your knife. Use this beauty I bought for me and my mom. We each keep ours near the knife block. We use it before every use. It is not a sharpener - but a honer. I learned most knives are really dull, they are just bent slightly. This fixes that. Plus! It's only $20!

6 - Love them. Cherish them! Do not use them to open boxes or for sword fights. Just food please.