Showing posts with label dessert. Show all posts

November 18, 2011

Homemade Granola Bars


I know I may be on the slow train, but I just recently tried out agave nectar (Xagave) for the first time. It is great. It has a very similar to honey in texture. But the flavor is not as floral. I love using it in drinks and sauces since I don't worry about it not dissolving completely and being grainy like sugar. But I thought I would try it in baking. So I tried them in my favorite Granola Bar recipe.

My sister flew in a couple months ago to help me drive my kiddos to Utah for a family reunion. And of course, our family needs delicious food on our drive. We were both trying to be healthy - our snacks consisted of apples, grapes, carrots, and celery. But we needed something sweet. These granola bars were perfect. They may not be the lowest in calories, but if I am going to have chocolate chips, it is nice to know they are surrounded by oats, wheat germ, seeds, and other delicious ingredients. But don't worry - these taste so much better than you would expect. Plus now the the added agave factor, the glycemic index is much lower!

This recipe is very versatile: add in dried fruit (I totally recommend this!), nuts, candy, other seeds, whatever you think! Also, if needed for allergies, you can omit the peanut butter. Here are two of my variations.


Granola Bars

from my friend, Jenny M.
1 cup brown sugar
1/3 cup agave (or 1/2 cup honey)
2 t. vanilla
2/3 c. peanut butter
1/2 cup melted butter
3 Cups oats
½ cup sunflower seeds
2 t. sesame seeds
½ cup coconut
1/3 cup wheat germ
1 cup chocolate chips

Preheat oven to 350 F. In a mixing bowl combine brown sugar, agave, vanilla, peanut butter, and butter. Stir in remaining ingredients. Press into a greased cookie sheet and bake 20-23 minutes (depending on the chewiness you like). Let cool before cutting and serving.


My Favorite Granola Bars
(White Chocolate Cranberry Bars)

Prepare as above except omit chocolate chips and add in 2/3 c white chocolate chips, 2/3 cup dried cranberries, and 1/2 cup pecans. 


August 22, 2011

Grandma's Oatmeal Chocolate Chip Cookies

We had some new neighbors move in - and what's a better way to welcome someone to the neighborhood than with the best cookies ever?! These are my favorite cookies of all time. Straight from my grandma's cookbook. This is the dirtiest page in the cookbook, that tells you how good they are.
I made a simple tag with this cute stamp. I am glad my sister talked me into buying it. It makes me want to make treats for more people.


Oatmeal Chocolate Chip Cookies
3/4 cup shortening
3/4 cup brown sugar
3/4 cup white sugar
2 eggs
1 tsp vanilla
1 1/2 cup flour
3/4 tsp salt
1 tsp soda
2 cup quick rolled oats
1 pkg chocolate chips

Cream together shortening and sugars. Add eggs. Add remaining ingredients in order and mix well. Bake at 350 degrees until done. (That's how my grandma wrote it - but for us it is about 12 minutes)

Tips:
Add 3/4 cup chopped nuts if you'd like (and I do!)
I like to go a little lighter on the chocolate chips - like 3/4 of the bag
Use a small spring-loaded ice cream scoop, like this one, to make uniform sized cookies.

March 15, 2011

"Golden" Caramel Popcorn

I have posted this recipe before, but it is so fun, I thought you might want a reminder.
A few years ago my sister and I started the St. Patrick's tradition of doing a gold hunt for our kids. They follow clues on rainbows to the next and finally end up at a pot of gold. When we took this picture, our pot broke, so we had a basket of gold. We used golden wrapped candies (Rolos, Twix, coins are all great) and I made Golden (caramel) Popcorn.

What are some of your St. Patrick's Day Traditions?


Caramel Popcorn
adapted from my Grandma Smith
6-8 c popped popcorn
1 1/2 c white sugar
1 c brown sugar
1/2 c white Karo Syrup
3/4 c water
1 tsp baking soda
1 tsp vanilla
4 Tbsp butter
1 tsp salt

Put popcorn in 9x13 pan and warm in 250 degree oven. Cook sugars, Karo, and water to 300 degrees. Add butter and salt. When melted, mix well. Remove from heat and add soda and vanilla. Stir well (and fast!). Pour over hot corn and stir and stir. Pour out on table and mold with hands.

These instructions are taken straight from my grandma's recipe card. I don't mold into balls with my hands, but be careful if you do - remember the sugar is super hot!

Tips:
  • Use a larger pot than what you think - when you add the soda and vanilla it will puff up a lot!
  • If you want to double the batch, make in two separate waves. The sugar cools too fast to do one big doubled-batch.
  • Be patient, it does take a little while to get to 300 degrees. 
  • This is a crunchy caramel popcorn. The way to tell - soft caramel corn has sweetened condensed milk and crunchy has baking soda.

February 09, 2011

Creme Brulee

I had a great birthday - nice and calm. I didn't get the creme brulee made until later in the week - but they were certainly worth the wait! Mmm. Lindsey raved about this recipe on her blog, so I decided it was the one I should try. I was not disappointed!


Crème Brûlée
by Dorie Greenspan
1 ¼ cups heavy cream
½ cup whole milk 3 large egg yolks
1 / 3 cup sugar
2 tsp pure vanilla extract
About 6 tablespoons sugar or sifted light brown sugar, for topping

Center a rack in the oven and preheat the oven to 200ºF. Put the six baking dishes on a baking sheet lined with parchment or a silicone mat.
Bring the cream and milk just to a boil.
In a 1 or 2-quart glass measuring cup or in a medium bowl, whisk the egg yolks, sugar and vanilla together until well blended but not airy. Still whisking, drizzle in about one quarter of the hot liquid---this will temper, or warm, the yolks so they won’t curdle. Whisking all the while, slowly pour in the remainder of the cream and milk. Give the bowl a good rap against the counter to de-bubble the custard, then strain it into the baking dishes. Place dishes in a larger dish (i.e. 9x13 pan) and pour water into the larger pan until reaches half way up the custard dishes.
Bake the custards for 50 to 60 minutes, or until the centers are set---tap the sides of the dishes, and the custards should hold firm. Lift the dishes onto a cooling rack and let the custards cool until they reach room temperature.
Cover each custard with plastic wrap and refrigerate for at least 3 hours, preferably longer. (The custards can be kept covered in the refrigerator for up to 2 days.) For the sugar to be successfully caramelized, the custards need to be thoroughly chilled.
Makes 6 servings.

Tips from Dorie:
  • The most efficient way to caramelize the sugar topping is to use a blowtorch . If you don’t have a torch, you can chill the custards very, very well, then set them in an ice-cube-filled roasting pan and run them under the broiler. You won’t get as even a coating with the broiler as you would with the torch, but you’ll still get the flavor and the pleasure of a crackly sugar crust over cream custard.
  • The best baking dishes for crème brûlée are shallow, ideally just an inch high, about 4 inches in diameter and holding about ¾ cup of liquid. Porcelain, pottery or glass gratin or baking dishes are perfect, but if you don’t have them, you can use ramekins or even disposable aluminum foil pans, an unglamorous but effective solution.
  • Serve the crème brûlée when the crème is really cold and the brûlée is still warm. You can serve the whole dessert chilled, but the sugar topping won’t have its characteristic crackle. And while I think crème brûlée should be served with nothing more then a spoon, you could offer berries and cookies as accompaniments.
  • The custard for crème brûlée must be made ahead so it has plenty of time to chill, but once you’ve caramelized the sugar on top, your storage time is over if your want the sugar to have crunch.

December 06, 2010

Pumpkin Pie

Thanksgiving, though over a week ago, was a blast. But I will say, I was slightly disappointed that there was no pie. In our family that's the best part! So for Sunday dinner, I made pumpkin pie. I had all the ingredients and thought why not! I have never made a pie before so I was slightly nervous. But I was really pleased with the outcome. I was planning on using half butter and half shortening, but my shortening was gone. I did straight butter and was surprised that it still came out very flaky and very tasty!
Thanks to my sister who suggested this pie crust recipe, I used the same ingredients - but the directions are my own, hence the silliness and possibly bad grammar.


Pumpkin Pie
adapted from here and here
Pie Crust
2 1/2 cups all-purpose flour
1/2 teaspoon salt
1 cup butter, chilled and diced
1/2 cup ice water

Cut butter into small cubes (I do about 24 cubes per stick). Place in freezer while you prepare the rest of your ingredients (you don't want it frozen, just really cold when you are ready to use it). Next make a big bowl of ice water, set aside. Okay, now you are ready to go.
In your food processor, combine flour and salt, pulse a few times just to mix it up. Add butter, pulse until mixture looks like coarse crumbs. While pulsing, add water, a couple tablespoons at a time, until comes together. (Here's a trick: if you pinch the dough and it holds together - you are good. Too much water = soggy crust. Lean toward the dry side!) Cut in half and form lightly into balls. Wrap in plastic and refrigerate for 4 hours or overnight.
Roll dough out to fit a 9 inch pie plate. Place crust in pie plate. Press the dough evenly into the bottom and sides of the pie plate. Place back in fridge until ready to use, at least 30 minutes.

Tips:
Keep everything VERY cold! Have things ready and chilling until right before they go in the bowl! This is very important.
Remember - imperfect looking dough means a perfect tasting crust. If you mix it too much and it looks uniform, it isn't going to be flaky.
The less your hands touch it the better.

Pumpkin Pie Filling
1 1/2 cup granulated sugar
2 tsp ground cinnamon
1 tsp salt
1 tsp ground ginger
1/2 tsp ground nutmeg
4 large eggs
1 large can (30 oz.) Pumpkin Puree
24 oz Evaporated Milk

Mix sugar, cinnamon, salt, ginger and cloves in small bowl. Beat eggs in large bowl. Stir in pumpkin and sugar-spice mixture. Gradually stir in evaporated milk.
Separate evenly into two pie shells. Place on cookie sheet (just to be safe in case there is a spill, if you are more confident then me, go ahead and try without one).
Bake in preheated 425° F oven for 15 minutes. Reduce temperature to 350° F; bake for 40 to 50 minutes or until knife inserted near center comes out clean. Cool on wire rack for 2 hours. Serve immediately or refrigerate. Top with whipped cream before serving. 

Tips: 
I actually didn't have evaporated milk at my house. I used whole milk. The result was just as delicious, but the texture was slightly softer than the typical result. My husband actually preferred it.

December 03, 2010

Mint Chocolate Cupcakes

I love the flavors of mint and chocolate together. Always a classic combo. But I especially love these flavors during the colder weather. These are a simple recipe. You will love this for your busy holiday season. Plus, the cookie bottom is a pleasant surprise!


Mint Chocolate Cupcakes
1 devils food cake mix, prepared according to directions
24 chocolate mint cookies, like Thin Mints (if you are lucky enough to find some)
Buttercream Frosting (recipe to follow)
12 chocolate mint cookies, crushed

Line muffin tin with papers, place one cookie at the bottom of each cupcake tin. Divide batter evenly between the 24 cupcakes. Bake according to directions. Cool completely on cooling rack. Frost with buttercream frosting (I like to add a drop or two of green coloring so people know what to expect). Top with crushed remaining cookies.

Buttercream Frosting
2 sticks butter, room temperature
6 cups powdered sugar
1 tsp vanilla
1-5 Tbsp milk
few drops food coloring (optional)

Tips: 
Make these at St. Patrick's Day too!

September 22, 2010

Football Themed Cake

Thanks to Jen from My Kitchen Addiction, I was inspired to make this cake for our Nebraska football game party. I will say this is my first attempt at something even close to cake decorating. My usual is frost the top of a 9x13 cake and call it good. I think it was because my frosting was always too thin. Anyway - this was actually quite fun and not too difficult. My cookies aren't perfect - but that makes them look homemade right?
So I made our family's favorite sugar cookie recipe and then decorated them with royal frosting. Now, I will say something about royal frosting - it looks so cute, but it isn't like the best frosting ever. It is for looks, not taste. (It doesn't taste bad, I just like my frosting buttery and sugary and vanilla-y.) I found tutorials on University of Cookie and Bake at 350 that helped me a lot through the whole process. Remember this was all new to me?
So here was the centerpiece of our party table. After more people arrived it was surrounded by delicious appetizers. Mmm, thanks to all who brought something.


I made football helmets, N's, footballs, and stars to add another color. The cookies were a big hit - they were one of the first things to disappear.

Here is the recipe for our family's favorite sugar-cookie recipe:

Sugar Star Cookies
1 cup butter
1 cup sugar
2 eggs
1 tsp vailla
3 cups flour
1 tsp baking powder
1/2 tsp baking soda
1/2 tsp salt

Cream butter and sugar together until light in color and fluffy. Add in eggs one at a time. Add vanilla. Sift together flour, baking powder, soda, and salt. Add to wet ingredients. Roll into ball and refrigerate 2-3 hours. Roll out, about 1/8 inch thick (yes, really that thin) and cut into desired shapes. Bake at 375 for 10 minutes or until edges are golden.

Tips:
No, I didn't roll my cookies out that thin for the cake, but I wish I would have.
My favorite way to eat these is to sprinkle with some sugar just before baking and eat plain. Or with just a thin layer of buttercream frosting.

August 31, 2010

Chex Giveaway

About a year ago I was training a new nurse and I found out that she had Celiac Disease. Now, I love bread and knew that that disease would be so hard for me. But then I found out so many things contain gluten - it is everywhere (even soy sauce!). Then a friend of mine's 11 year old daughter was diagnosed. She was having a hard time because she felt she was restricted from so many things. One of her favorite dishes was cold cereal. Well, I found out Chex is gluten free (except the wheat of course)! Lucky for her, she can still have one of my favorite treats - Muddy Buddies! (They also have lots of other gluten free recipes)

Muddy Buddies
recipe courtesy of chex.com
9 c Rice Chex®, Corn Chex® or Chocolate Chex® cereal (or combination)
1 c semisweet chocolate chips
1/2 c peanut butter
1/4 c butter
1 tsp vanilla
1 1/2 c powdered sugar

In 1-quart microwavable bowl, microwave chocolate chips, peanut butter and butter uncovered on High 1 minute; stir. Microwave about 30 seconds longer or until mixture can be stirred smooth. Stir in vanilla. Pour mixture over cereal, stirring until evenly coated. Pour into 2-gallon resealable food-storage plastic bag.
Add powdered sugar. Seal bag; shake until well coated. Spread on waxed paper to cool. Store in airtight container in refrigerator.

Tip: Freeze your Muddy Buddies - you will never go back! The only downside is you do have to wait at least 15 more minutes to taste these frozen goodies.

You are in luck! Chex is giving away a this prize pack:

Want to win the prize? Leave a comment telling me what your favorite Chex Treat is before Friday, September 4th at midnight MST.
For extra entries (leave a comment for each extra entry):
1. Tweet, blog, and/or facebook about this giveaway
2. Add my button to your sidebar

Sorry this giveaway is now closed. To see the winner click here.

August 25, 2010

Anniversary Dessert

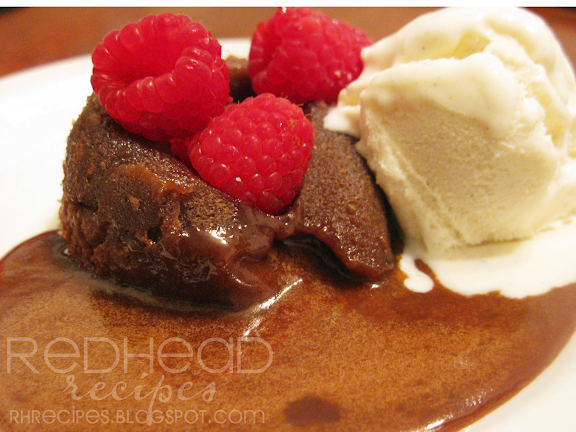
So I have been on a no-dessert diet for a few weeks now. I allow myself a little taste once a week. I knew I was going to want something decadent for our anniversary so I saved up for two weeks. My sister suggested I make Marta's "Melt in Your Mouth Mini's" They are really good. Although, I might double the chocolate next time to make it extra rich! (I have to splurge once in a while.) But as usual, Marta did not disappoint. Simple and a quick bake. Just how I like it.

Plus they are fun, these perfect innocent looking cakes then take a bite and it is chocolate lava heaven all over your plate. Just don't tell anyone I might have licked my plate.

June 29, 2010

Limeade Popsicles

Isn't she such a cutie?!

So I had a little leftover of our Brazilian Limeade. (Don't get me wrong, I could have drank the whole recipe alone) and had an awesome popsicle mold I got in the dollar section of Target -- don't you just love that place? So I decided to make these little popsicles. They are sophisticated enough for adults, but all kids love them too! My baby would fuss every time I took it out of her mouth so I could have a taste.

Brazilian Limeade Directions
Make this recipe
Freeze in popsicle molds overnight. Dip molds in hot water and popsicles will slide right out.

Tip: If you don't have popsicle molds, use ice cube trays, cover with foil, then stick toothpicks or cut straws, popsicle sticks, anything!

Can you tell she loves it?

May 07, 2010

Chocolate Truffle Cake

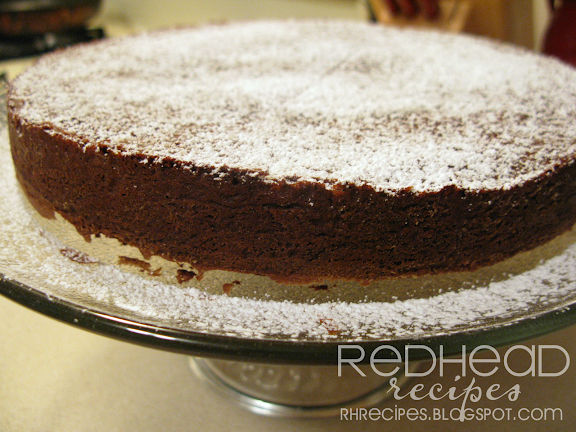
My mom, sister, and I are headed for a girl's trip for the weekend. And, typical me, I am so freakin' excited (sorry, I love that clip!) about the food. In honor of our girl's trip I thought I would give you a very girl-friendly dessert: Chocolate Truffle Cake. It is so delicious. So delicious! (The guys will like it too)
This cake is super moist and rich. It is delicious with a ganache glaze if you are feeling up to it - or just with some whipping cream if you aren't.


Chocolate Truffle Cake
8 oz semi-sweet chocolate, chopped
1 c butter
5 eggs
1 1/3 c sugar
2 Tbsp flour
1 Tbsp vanilla
1/4 tsp salt

Preheat oven to 325 degrees. Butter a 9-inch round spring-form pan and line the bottom with parchment paper. Butter the paper then flour the paper and pan sides. Cover the bottom of the outside of the pan with aluminum foil so that the tin batter does not leak out. Set aside.
In a medium sized pan over medium-low heat, melt chocolate and butter. Stir until smooth, about 2 minutes. Remove from heat and let cool slightly. In a large mixing bowl, whisk together the eggs and sugar until pale in color. Whisk in chocolate mixture. Then stir in the flour, vanilla, and salt until combined. Batter will be thin.
Pour the batter into the pan. Bake until the cake is set and slightly puffed in the center, about 1 hour and 10 minutes. Transfer to a rack and let cool until warm. Invert onto a serving plate. Carefully remove parchment paper. Let cool completely. This cake can be covered tightly and refrigerated overnight, but you should remove it from the fridge about 2 hrs before you serve it.

April 29, 2010

White (Pink) Chocolate Mousse

In honor of fighting cancer, I thought I would post a pink recipe in my new cute pink glasses.


White (Pink) Chocolate Mousse
1 cup white chocolate chips
2 egg yolks
2 tablespoons sugar
1/4 cup heavy cream, plus 1 cup
3-4 drops red food coloring

In a large glass bowl, place the chopped white chocolate and set aside.
Add the egg yolks and sugar to a small bowl and whisk until pale in color.
In a saucepan, over low heat, bring 1/4 cup of the cream to a simmer, and slowly add the cream into the yolk and sugar mixture to temper. Pour the creamy mixture back into pan and stir with a wooden spoon until it coats the back of it.
Pour hot mix into a fine mesh sieve placed directly over bowl with the chopped chocolate. Stir until completely smooth. Add red food coloring.
In another bowl, whip remaining 1 cup of the cream to almost stiff peaks. Fold half the whipped cream into the white chocolate mix to lighten and then fold in the remaining whipped cream.
Spoon the white chocolate mousse into 4 serving cups and refrigerate until set, approximately 1 hour.
Serve with sliced strawberries, or other berry of your choice.

April 09, 2010

Chocolate Souffle

So for my new ingredient/recipe/dish recipe I thought I would try a souffle. I have never made one before. The only one I have eaten was made by Jet Set (although that post was funny, don't be decieved, the souffle was delicious!). It was divine. But I decided to try out a chocolate one this time. I made it for our vegetarian-theme night for cooking club. Hey, they didn't say vegan. Honestly, I mostly made it for you.
For baking, I don't make up recipes. I haven't learned that science yet. I was a little nervous, to tell you the truth, about it. I hear they are hard and often people say they don't turn out. So, I turned to my best friend who is a pastry chef (who is currently on hiatus because she had triplets!) for tips and recipes. She gave me a few good tips, sent me to the internet for recipes, and wished me luck.

After searching the web, I chose this recipe because it used the same size souffle dish I had and I didn't have to buy alcohol for it. (We don't drink so I don't have it in the house.) I did make some minor adjustments, but I thought it was quite delicious. I hope you try it out - it was an adventure!


Chocolate Souffle 
adapted from George Duran
6 oz bittersweet chocolate, chopped
4 oz semi-sweet chocolate, chopped
1 stick unsalted butter, cut into tablespoon pieces, plus more for greasing
1 tsp vanilla extract
1/4 tsp salt, plus a pinch for the egg whites
12 Tbsp sugar, divided; plus more for dusting dish
5 large eggs, separated into yolks and whites, at room temperature for 30 minutes
1/4 c all-purpose flour

Put an oven rack in the middle position and preheat the oven to 350 degrees F. Butter a 6-cup souffle dish or casserole. Dust with granulated sugar.
Melt the chocolates and butter in a large bowl in a microwave-safe glass bowl in a microwave at 50 percent power for 2 to 3 minutes, stirring well every 30 seconds until the chocolate is melted and smooth. Cool completely.
Add vanilla, salt, and 6 tablespoons sugar. Add yolks 1 at a time, whisking well after each addition. Whisk in the flour.
Beat the whites with a pinch of salt in a bowl using an electric mixer at high speed until they hold soft peaks. Add the remaining 6 tablespoons sugar, 1 tablespoon at a time, beating until the whites hold stiff glossy peaks.
Whisk about 1/4 of the whites into the chocolate mixture to lighten the batter, then fold in the remaining whites gently but thoroughly. Pour the batter into the souffle dish, spreading it evenly.
Bake about 30 to 35 minutes or until the center is still jiggling and a toothpick inserted in the center comes out with moist crumbs adhering to it (It took me 35-40 min). Serve the souffle warm. 

* Tips: when folding the egg whites into the chocolate mixture be very gentle. The more you add, the more careful you should be. 
I served mine with fresh strawberries. A light dusting of powdered sugar would be very pretty.

April 03, 2010

Traditions

Before I start all the fresh and new items Monday, I wanted to share something that is important to me.


I am a member of the Church of Jesus Christ of Latter-Day Saints, LDS church, or Mormons. Twice a year we are able to watch through television, the beauty of the internet, or through the church's monthly magazine, hear the words of our church leaders. I love it.

Since I was little my mom made cinnamon rolls every 6 months when conference would start. We looked forward to it every April and October. Now that we are all grown, all the kids make them every year for our families. (And we will all argue that we make them the best.)

Check out the full recipes for the Cinnamon Rolls here.

March 16, 2010

Gold Hunt and "Golden" Popcorn Recipe

A couple years ago my sister and I decided to have a big St. Patrick's Day Party. We made Irish Food and I started St. Patrick's Gold Hunt. I hid rainbows throughout the house and they let to a pot of gold. My sister was nice enough to post a free print out of rainbows for you to use.
Our "pot" broke (we used a witch's cauldron from Halloween), so this year it was a basket. We started out doing just gold-wrapped candies. But this year I decided to make some "Golden" Popcorn. It was a big hit.


Caramel Popcorn
adapted from my Grandma Smith
6-8 c popped popcorn
1 1/2 c white sugar
1 c brown sugar
1/2 c white Karo Syrup
3/4 c water
1 tsp baking soda
1 tsp vanilla
4 Tbsp butter
1 tsp salt

Put popcorn in 9x13 pan and warm in 250 degree oven. Cook sugars, Karo, and water to 300 degrees. Add butter and salt. When melted, mix well. Remove from heat and add soda and vanilla. Stir well (and fast!). Pour over hot corn and stir and stir. Pour out on table and mold with hands.

These instructions are taken straight from my grandma's recipe card. I don't mold into balls with my hands, but be careful if you do - remember the sugar is super hot!

Tips:
  • Use a larger pot than what you think - when you add the soda and vanilla it will puff up a lot!
  • If you want to double the batch, make in two separate waves. The sugar cools too fast to do one big doubled-batch.
  • Be patient, it does take a little while to get to 300 degrees. 
  • This is a crunchy caramel popcorn. The way to tell - soft caramel corn has sweetened condensed milk and crunchy has baking soda.

March 10, 2010

Chocolate Fondue

I love fondue parties. I think it is so much more social and comfortable than a normal dinner party. It's so fun to sit around the table, chatting and eating. If you want a more formal dinner, have this for dessert to get things cozy before you pull out the board games.

You are going to die (unless you already know) at how easy this chocolate fondue is. Basically it is just warm ganache. So don't throw away your leftovers! (Why were you thinking of throwing away chocolate?!) Warm it up and top you next cake with it, or ice cream, or use at room temperature for frosting or filling a cake, or put it on top of potato chips (the ruffly ones, I know what your thinking, but trust me), or eat it with a spoon like me and Lou do.

Okay, enough of the tangent here is the recipe.


Chocolate Fondue
12 oz good quality chocolate
1 c heavy whipping cream
dash of vanilla
pinch of salt (I learned this from my pastry chef friend)

Melt together in microwave safe bowl, stirring every 15 seconds, until melted. Transfer to fondue pot on low temperature. Dip in your favorites.
*For a variation try adding cinnamon, or peanut butter; or replace the vanilla with mint extract, amaretto, or other extracts you like. 


Some of my favorite dippers are pound cake (our store was out, so we went for angel food cake), pretzels, graham crackers, marshmallows, bananas, and of course - strawberries.

February 25, 2010

Lemon Bars

To finish off our Valentine's Menu, I made one of AC's favorite desserts - Lemon Bars. Kind of a nice refreshing finish to a meal.


Lemon Bars
adapted from this cook book
Crust:
1 c butter at room temperature, plus more for pan
1 c powdered sugar
2 cups flour

Filling:
4 large eggs
2 c sugar
1 Tbsp grated lemon zest (for me, this was about 1 1/2 lemons)
6 Tbsp fresh lemon juice (about 1 1/2 lemons as well)
1/3 c flour
1 tsp baking powder

Preheat oven to 325 degrees. Grease a 9x13 pan with butter. For crust: In a bowl, cream butter and powdered sugar, scrapping sides of bowl occasionally. Add flour and mix until well blended spread mixture in an even layer on the bottom and sides of the prepared pan. (Watch your corner, they tend to get thick.) Bake crust until lightly brown, about 15-20 minutes. Remove from oven and cool completly on wire rack.
Raise oven temperature to 350 degrees. For filling: Beat eggs until well blended, about 2 minutes. Add sugar and beat until thick. Add lemon zest and juice, flour, and baking powder until well blended and pale yellow. Pour filling into baked, cooled crust. Spread evenly.
Bake until filling is set - firm on edges but still a little soft in the middle, 15-20 minutes. Remove from the oven and set on a wire rack to cool slightly. Using a sifter or seive, dust top with powdered sugar while still warm. Cut into desired size and serve warm.

February 18, 2010

Happy Birthday Lou

My baby turned 1! I can't believe it. This past year went so fast.

 
My baby butterfly

I had a lot of fun doing her party. I was inspired when I saw this book, Hello Cupcake. They had some beautiful butterflies that looked so fun to make. Of course, they were our first attempt and didn't turn out as good as the book, but I am pretty proud.
 

What are the cupcakes?:
Wings & antenna - melted chocolate dark and pink (bought at local craft store, pre-colored)
Bodies - 4 brown M&Ms and/or Reese's Peices
Buttercream frosting
Vanilla cupcakes - used this recipe

Tips for assembling:
If you look closely on  some of the butterflies you will notice candies under the wings, this holds them up in flight.
Make extra wings and lots of extra antennas. They may break.

 
My baby loved them. Can you tell? 

Dear Lou - thanks for the best year of my life. You have made me such a better person. I love you more each day. You are my favorite girl in the world. Kisses!
Mama.

February 02, 2010

Crepes

For my birthday, and in honor of National Crepe Day, we decided to have Strawberry Crepes for breakfast. They were mighty tasty, if I do say so myself.


Crepes
1 c flour
1 1/3 c milk
3 eggs
6 Tbsp butter, melted (plus extra for pan)
pinch salt

Combine all ingredients in blender. Blend until smooth. Let batter rest for a few minutes while you prepare your fillings.
Heat an 8-inch nonstick saute pan over medium heat. Brush the pan with melted butter. Pour 1/4 cup batter into the hot pan, twirling the pan so the batter spreads out evenly into a very thin layer. Cook about 30 seconds until the crepe comes away from the sides of the pan. Cook until batter is dry and slightly browned. Transfer to a plate. Fill with whatever you'd like.  Makes about 8 crepes.

December 21, 2009

Baking Party

I had a fun baking party with my in-laws this past weekend. We made way too many treats, and didn't make all that we had planned. It was just going to be the girls, but then neices and nephews and a couple husbands showed up. It was crazy, but fun!

My beautiful Sister-in-Law Aiden, and me frosting the sugar cookies.
 
Here are some of the treats - Ginger Cookies, Candy Cane Shortbread,  Chocolate Dipped Pretzels, and Peanut Butter Kisses. We also made sugar cookies, but we ate them before I got a picture.

They were all delicious. But I have to say my favorite were the Ginger Cookies.
Here is the recipe if you want to make some for Santa this week.

Ginger Cookies
from Paula Deen
3/4 cup vegetable shortening
1 cup sugar, plus more for rolling
1 large egg
1/4 cup molasses
2 cups sifted all-purpose flour
2 teaspoons baking soda
1 teaspoon ground cinnamon
1 teaspoon ground ginger
1/2 teaspoon ground cloves
1/2 teaspoon salt


Preheat the oven to 350 degrees F.

Line cookie sheets with parchment paper or nonstick baking mats. Using an electric mixer at low speed, cream the shortening and sugar until thoroughly combined. Add the egg and molasses and beat until completely incorporated. Sift together the flour, baking soda, cinnamon, ginger, cloves and salt and add to the mixture. Stir until combined. Roll the dough into balls about 1-inch in diameter. Roll the balls in sugar. Place 1/2-inch apart on the prepared cookie sheets. Flatten the balls slightly with your fingertips. Bake for 12 minutes. Cool on wire racks.